
Today I experimented a little with the Rekognition service that AWS offers. I started out by experimenting with doing a Python version of this project, following this K-pop Idol Identifier with Rekognition post. It was pretty easy to setup; however, I tend to use R more than Python for data analysis and manipulation.
I found the excellent paws package, which is available through CRAN. The documentation for the paws package is very good, organized in an attractive github site here.
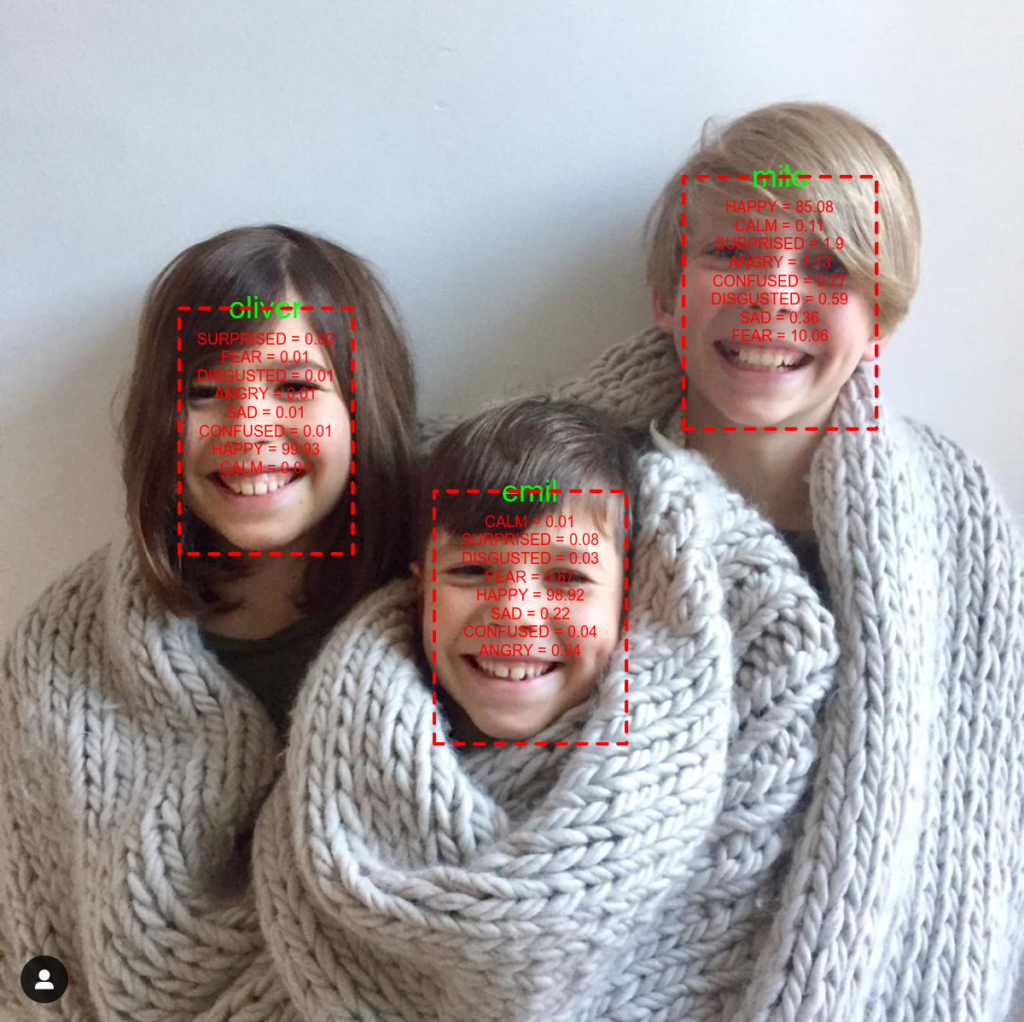
To start, I just duplicated the Python project in R, which was fairly straightforward. Then, I expanded on it a bit to annotate a photo with information about the emotional expressions being displayed by any subjects. The annotated image above shows what the script outputs if it is given a photo of my kids. And, here’s the commented code that walks through what I did.
# Setup the environment with libraries and the key service
########################
# Use the paws library for easy access to aws
# Note: You will need to authenticate. For this project, I have my credentials in an
# AWS configuration; so, paws looks there for them.
# paws provides good information on how to do this:
# https://github.com/paws-r/paws/blob/master/docs/credentials.md
library(paws)
# Use the magick library for image functions.
library(magick)
# This application is going to use the rekognition service from AWS. The paws documentation is here:
# # https://paws-r.github.io/docs/rekognition/
svc <- rekognition()
########################
# First, create a new collection that you will use to store the set of identified faces. This will be
# the library of faces that you use for determining someone's identity
########################
# I am going to create a collection for a set of family photos
svc$create_collection(CollectionId = "family-r")
# I stored a set of faces of my kids in a single directory on my Desktop. Inside
# this directory are multiple photos of each person, with the filename set as personname_##.png. This
# means that there are several photos per kid, which should help with classification.
# Get the list of files
path = "~/Desktop/family"
file.names = dir(path, full.names=F)
# Loop through the files in the specified folder, add and index them in the collection
for(f in file.names) {
imgFile = paste(path,f,sep="/")
# This gets the name of the kid, which is embedded in the filename and separated from the number with an underscore
imgName = unlist(strsplit(f,split="_"))[[1]]
# Add the photos and the name to the collection that I created
svc$index_faces(CollectionId="family-r", Image=list(Bytes=imgFile), ExternalImageId=imgName, DetectionAttributes=list())
}
########################
# Second, take a single photo that has multiple kids in it. Label each kid with his name and the
# emotions that are expressed in the photo.
########################
# Get information about a group photo
grp.photo = "~/Desktop/all_three_small.png"
# Read the photo using magick
img = image_read(grp.photo)
# Get basic informatino about the photo that will be useful for annotating
inf = image_info(img)
# Detect the faces in the image and pull all attributes associated with faces
o = svc$detect_faces(Image=list(Bytes=grp.photo), Attributes="ALL")
# Just get the face details
all_faces = o$FaceDetails
length(all_faces)
# Loop through the faces, one by one. For each face, draw a rectangle around it, add the kid's name, and emotions
# Duplicate the original image to have something to annotate and output
new.img = img
for(face in all_faces) {
# Prepare a label that collapses across the emotions data provided by rekognition. Give the type of
# emotion and the confidence that AWS has in its expression.
emo.label = ""
for(emo in face$Emotions) {
emo.label = paste(emo.label,emo$Type, " = ", round(emo$Confidence, 2), "\n", sep="")
}
# Identify the coordinates of the face. Note that AWS returns percentage values of the total image size. This is
# why the image info object above is needed
box = face$BoundingBox
image_width=inf$width
image_height=inf$height
x1 = box$Left*image_width
y1 = box$Top*image_height
x2 = x1 + box$Width*image_width
y2 = y1 + box$Height*image_height
# Create a subset image in memory that is just cropped around the focal face
img.crop = image_crop(img, paste(box$Width*image_width,"x",box$Height*image_height,"+",x1,"+",y1, sep=""))
img.crop = image_write(img.crop, path = NULL, format = "png")
# Search in a specified collection to see if we can label the identity of the face is in this crop
o = svc$search_faces_by_image(CollectionId="family-r",Image=list(Bytes=img.crop), FaceMatchThreshold=70)
# Create a graphics device version of the larger photo that we can annotate
new.img = image_draw(new.img)
# If the face matches something in the collection, then add the name to the image
if(length(o$FaceMatches) > 0) {
faceName = o$FaceMatches[[1]]$Face$ExternalImageId
faceConfidence = round(o$FaceMatches[[1]]$Face$Confidence,3)
print(paste("Detected: ",faceName, sep=""))
# Annotate with the name of the person
text(x=x1+(box$Width*image_width)/2, y=y1,faceName, adj=0.5, cex=3, col="green")
}
# Draw a rectangle around the face
rect(x1,y1,x2,y2, border="red", lty="dashed", lwd=5)
# Annotate the photo with the emotions information
text(x=x1+(box$Width*image_width)/2, y=y1+50,emo.label, pos=1, cex=1.5, col="red")
dev.off()
}
# Write the image out to file
image_write(new.img, path="~/Desktop/annotated_image.png", format="png")